Usage
This section is for Data Pipelines CLI’s users. It will present how to use the tool and how it handles interaction
with the whole Data environment. Below diagram presents the sequence process how usually the toole is used and order in
which different commands are executed:

Preparing working environment
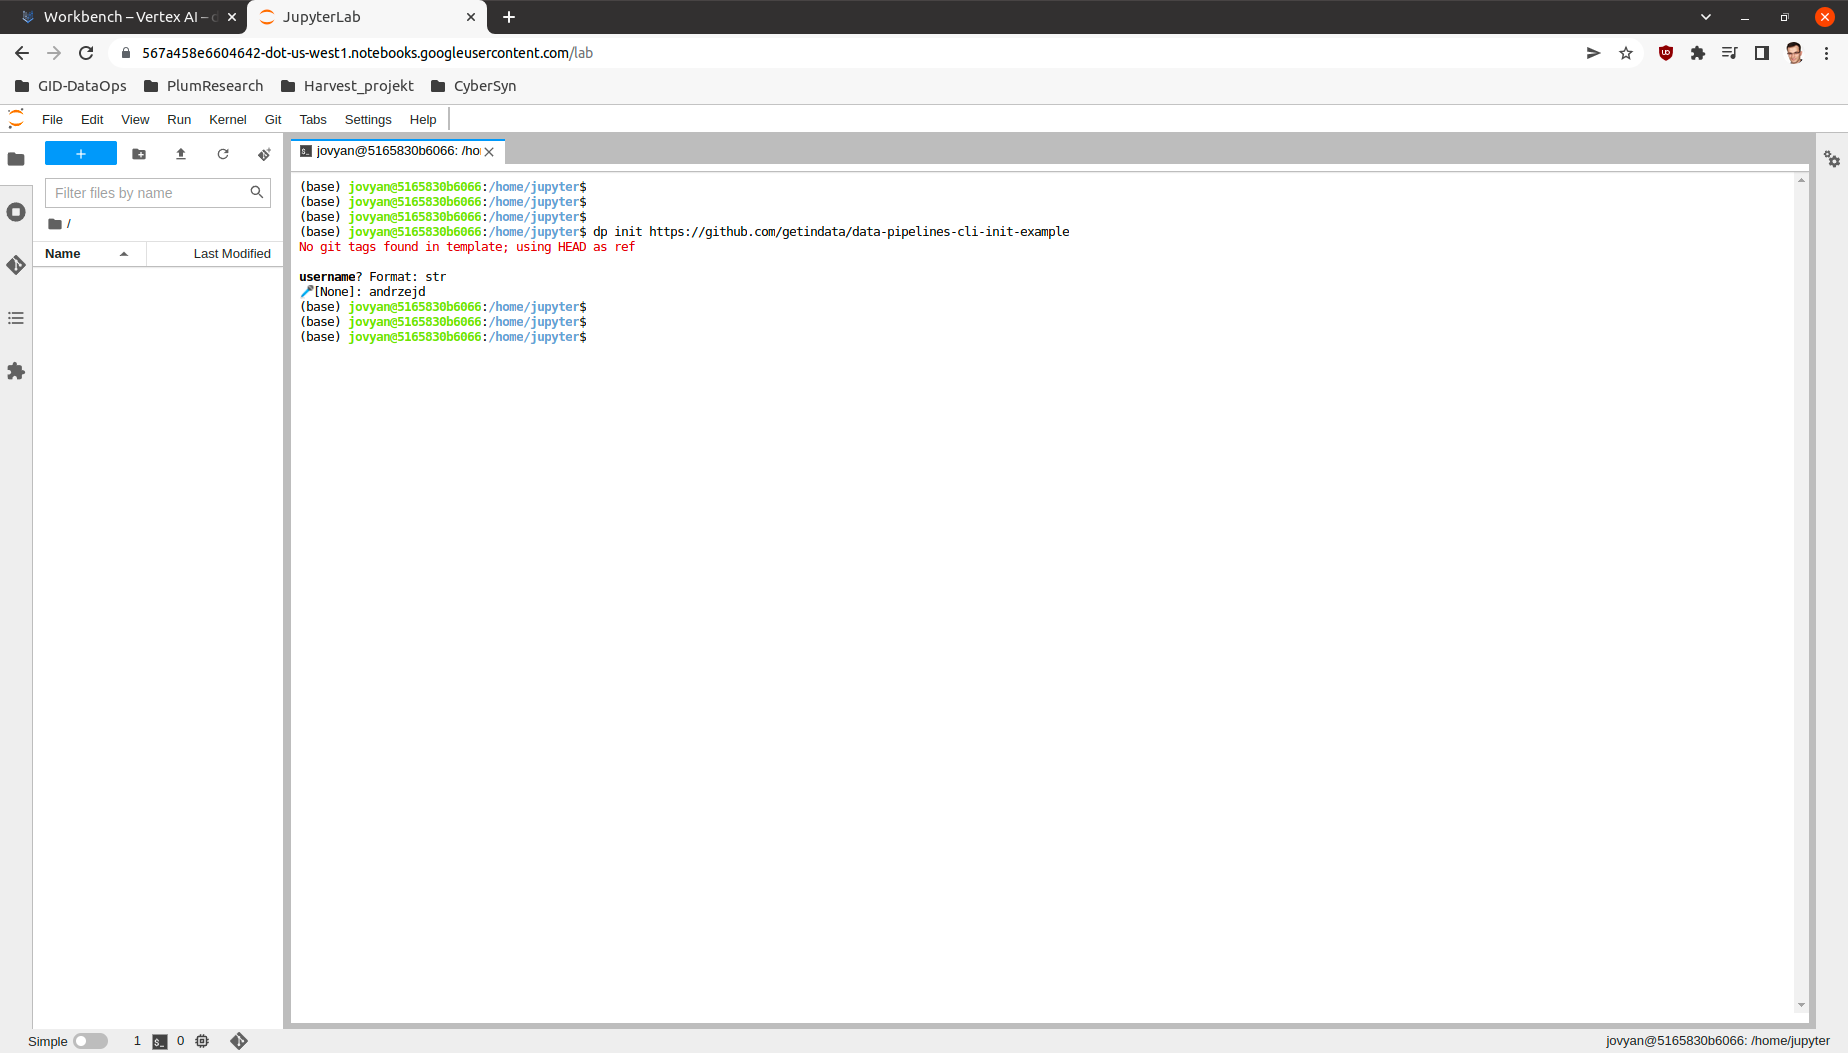
The first thing that needs to be done when starting Building Data Pipelines is to prepare the working environment. This step
can be done either on a local machine on any kind of Workbench (eg. JupyterLab). You will need a link from your
Data Engineer or Administrator to the template with initial configuration then, run dp init <CONFIG_REPOSITORY_URL>
to initialize dp. You can also drop <CONFIG_REPOSITORY_URL> argument, dp will get initialized with an empty
config.
This step is done only the first time for each working environment you want to use.
Example:
In this example only one variable you will be asked for and it is going to be username which is used in many dp commands.
dp init https://github.com/getindata/data-pipelines-cli-init-example
Project creation
You can use dp create <NEW_PROJECT_PATH> to choose one of the templates to create the project in the
<NEW_PROJECT_PATH> directory.
You can also use dp create <NEW_PROJECT_PATH> <LINK_TO_TEMPLATE_REPOSITORY> to point directly to a template
repository. If <LINK_TO_TEMPLATE_REPOSITORY> proves to be the name of the template defined in dp’s config file,
dp create will choose the template by the name instead of trying to download the repository.
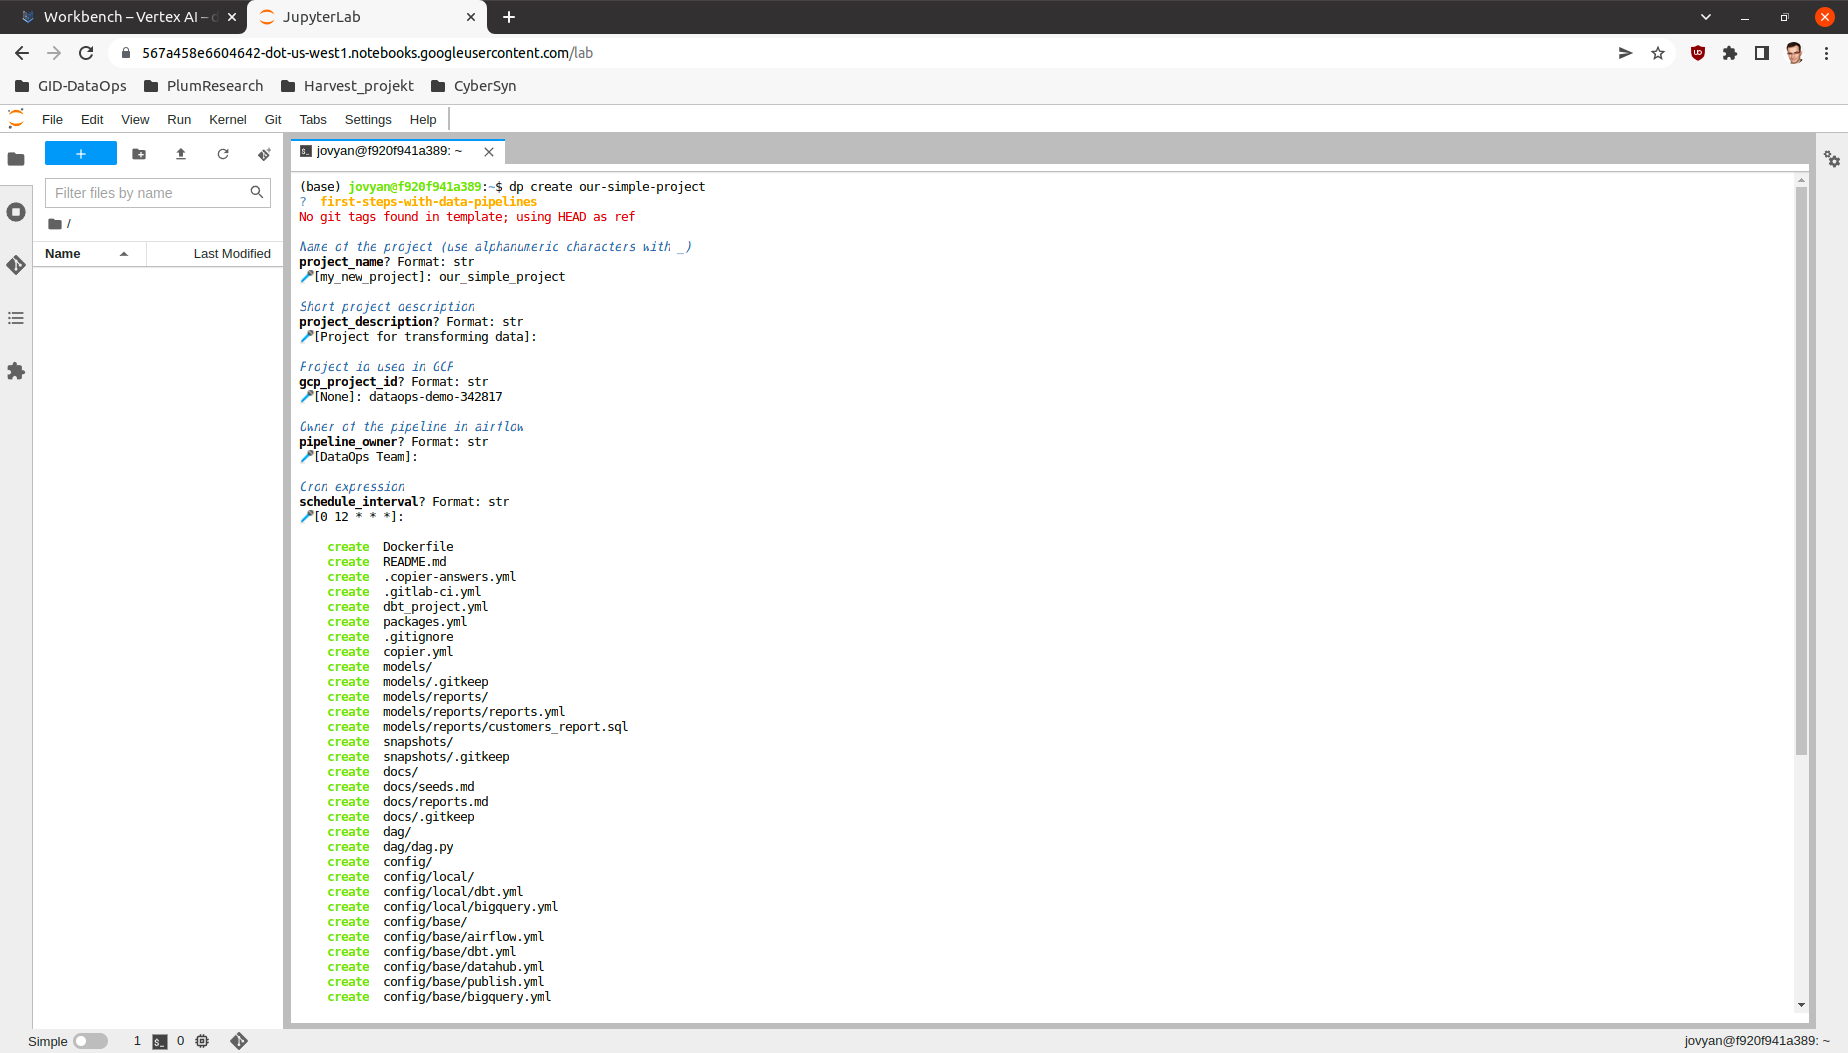
After the template selection, you will be asked a series of predefined questions in the template. Answering them all will cause a new empty project to be generated. The project will be adjusted and personalized based on answers to the questions.
Example:
Following command starts project creation process.
dp create our-simple-project
Fist step after this command is template selection:
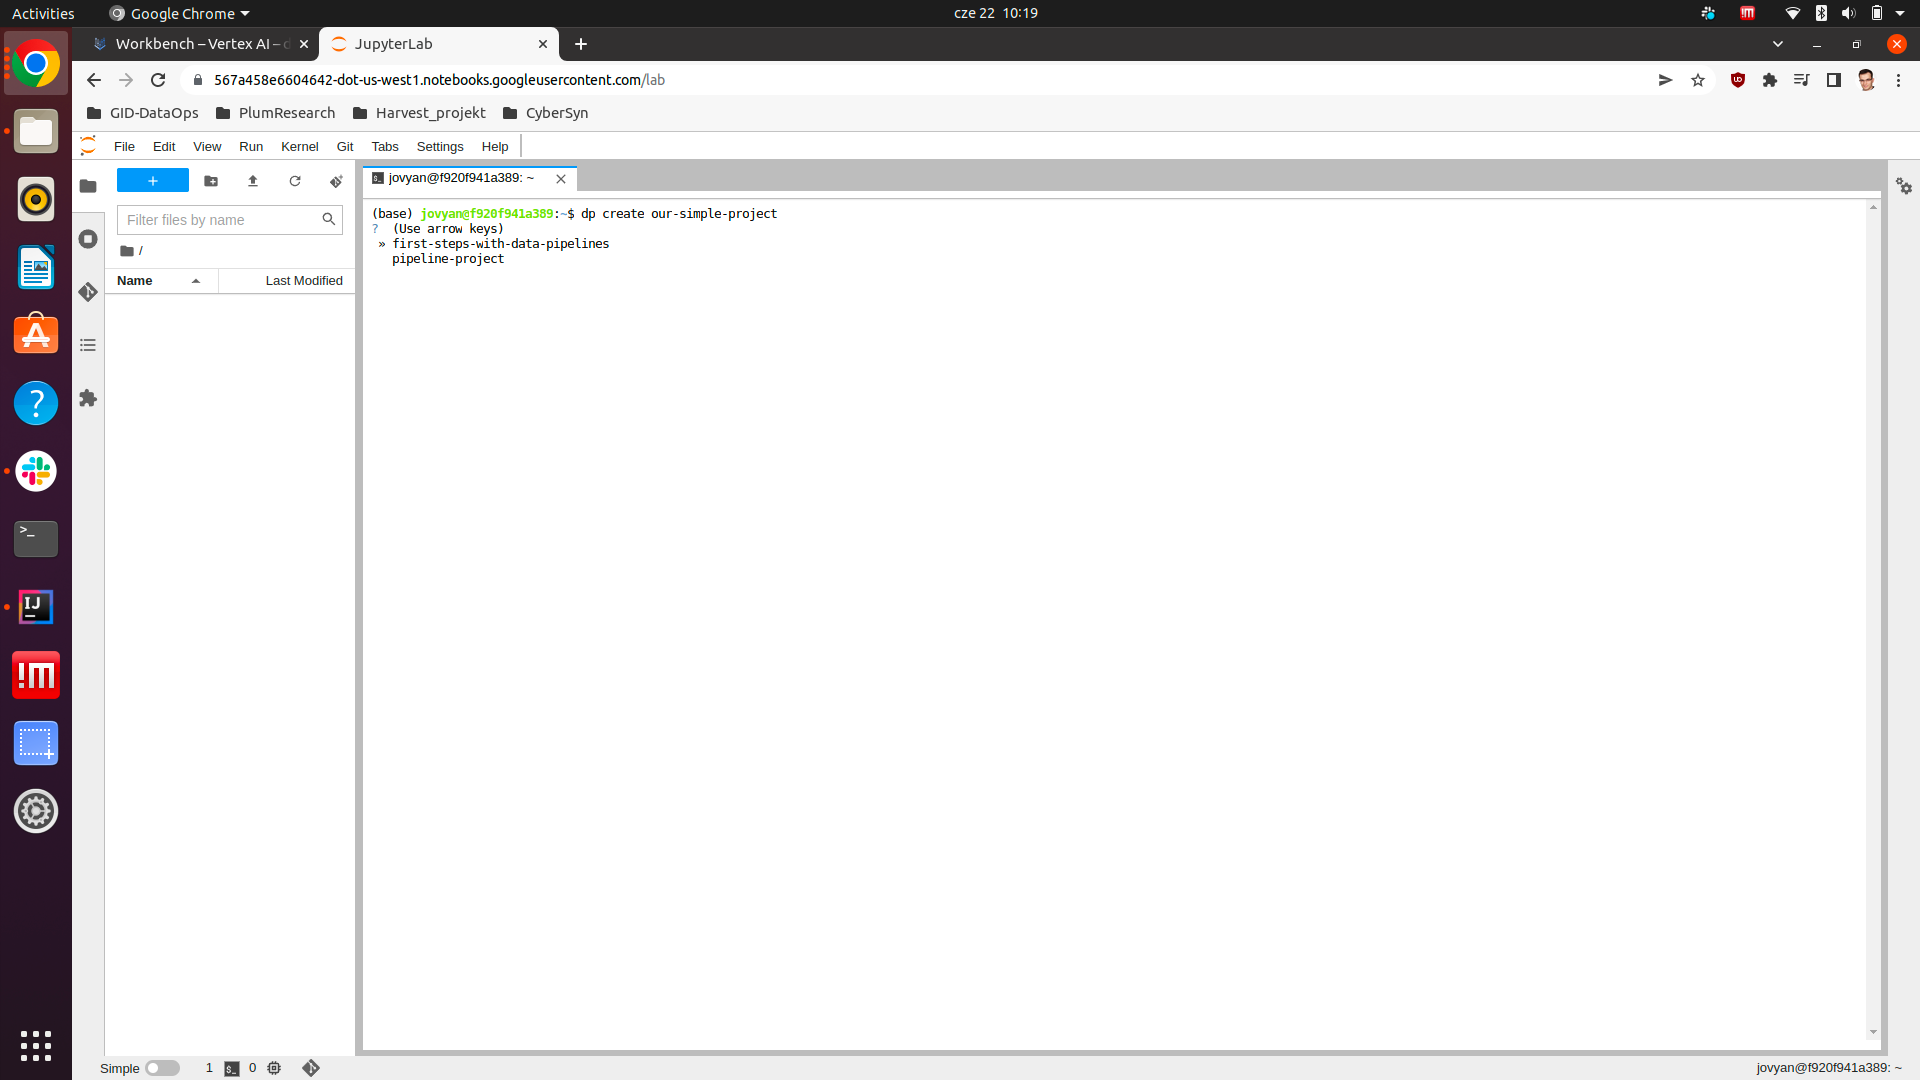
We can switch options by pressing up and down buttons and we can make a decision by pressing enter. After that, series of questions will be asked. Be aware that the name of the DP project should be composed of alpha-numeric signs and the _ sign. After answering these questions the tool will generate complete project.
Adapting working environment to VSCode
VSCode is recommended tool to work with dbt as you can add a plugin that makes the work more efficient. To configure
the plugin or integrate it with some other standalone application you will need to generate profiles.yml file from the project.
dp prepare-env prepares your local environment to be more conformant with standalone dbt requirements by saving
profiles.yml in the home directory.
However, be aware that IDE usage is optional, and you can comfortably use dp run and dp test
commands to interface with the dbt instead.
List all available templates
Execute dp template-list to list all added templates.
Project update
Whenever the template change you can update your project using dp update <PIPELINE_PROJECT-PATH> command.
It will sync your existing project with the updated template version selected by --vcs-ref option (default HEAD).
It may be very useful when the are some infrastructure changes in your organization and you need to upgrade all created projects (there can be hundreds of them).
Project compilation
dp compile prepares your project to be run on your local machine and/or deployed on a remote one.
Local run
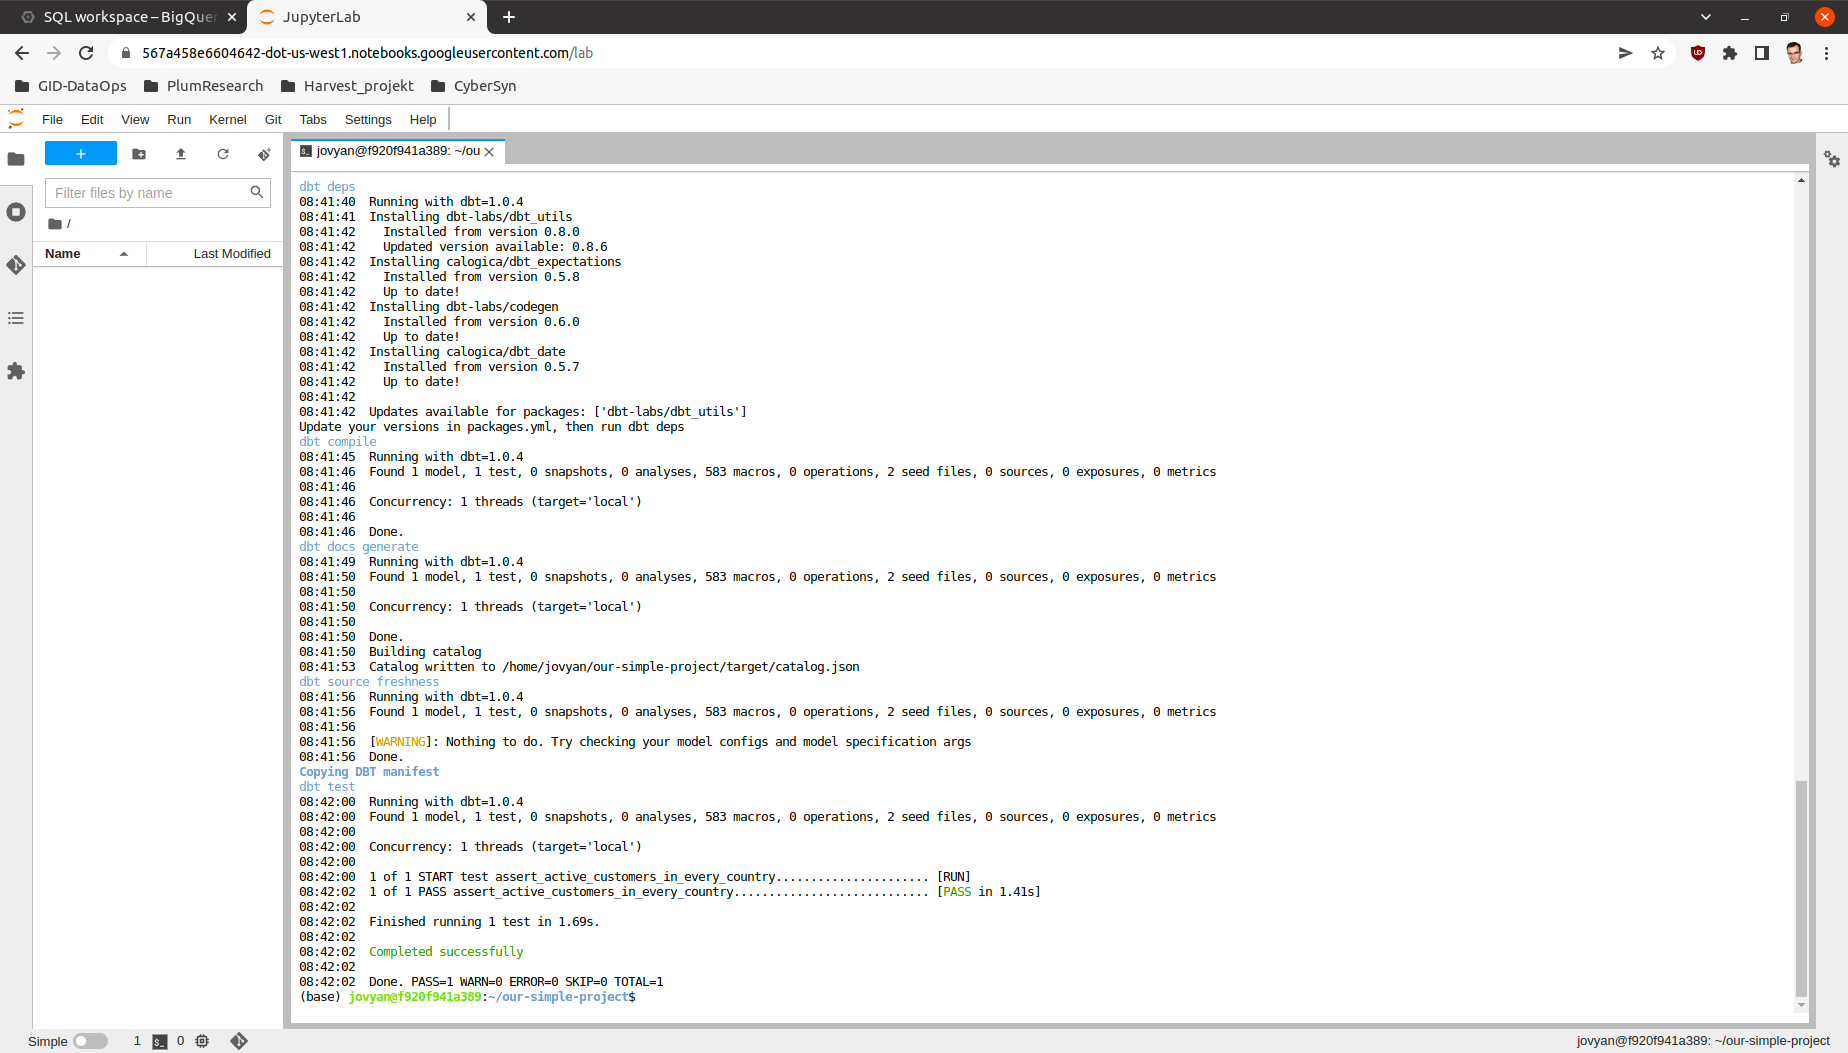
When you get your project created, you can run dp run and dp test commands.
dp runruns the project on your local machine,dp testrun tests for your project on your local machine.
Both commands accept --env parameter to select the execution environment. The default value is local.
Example:
dp run
This process will look at the contents of the models directory and create coresponding tables or views in data storage.
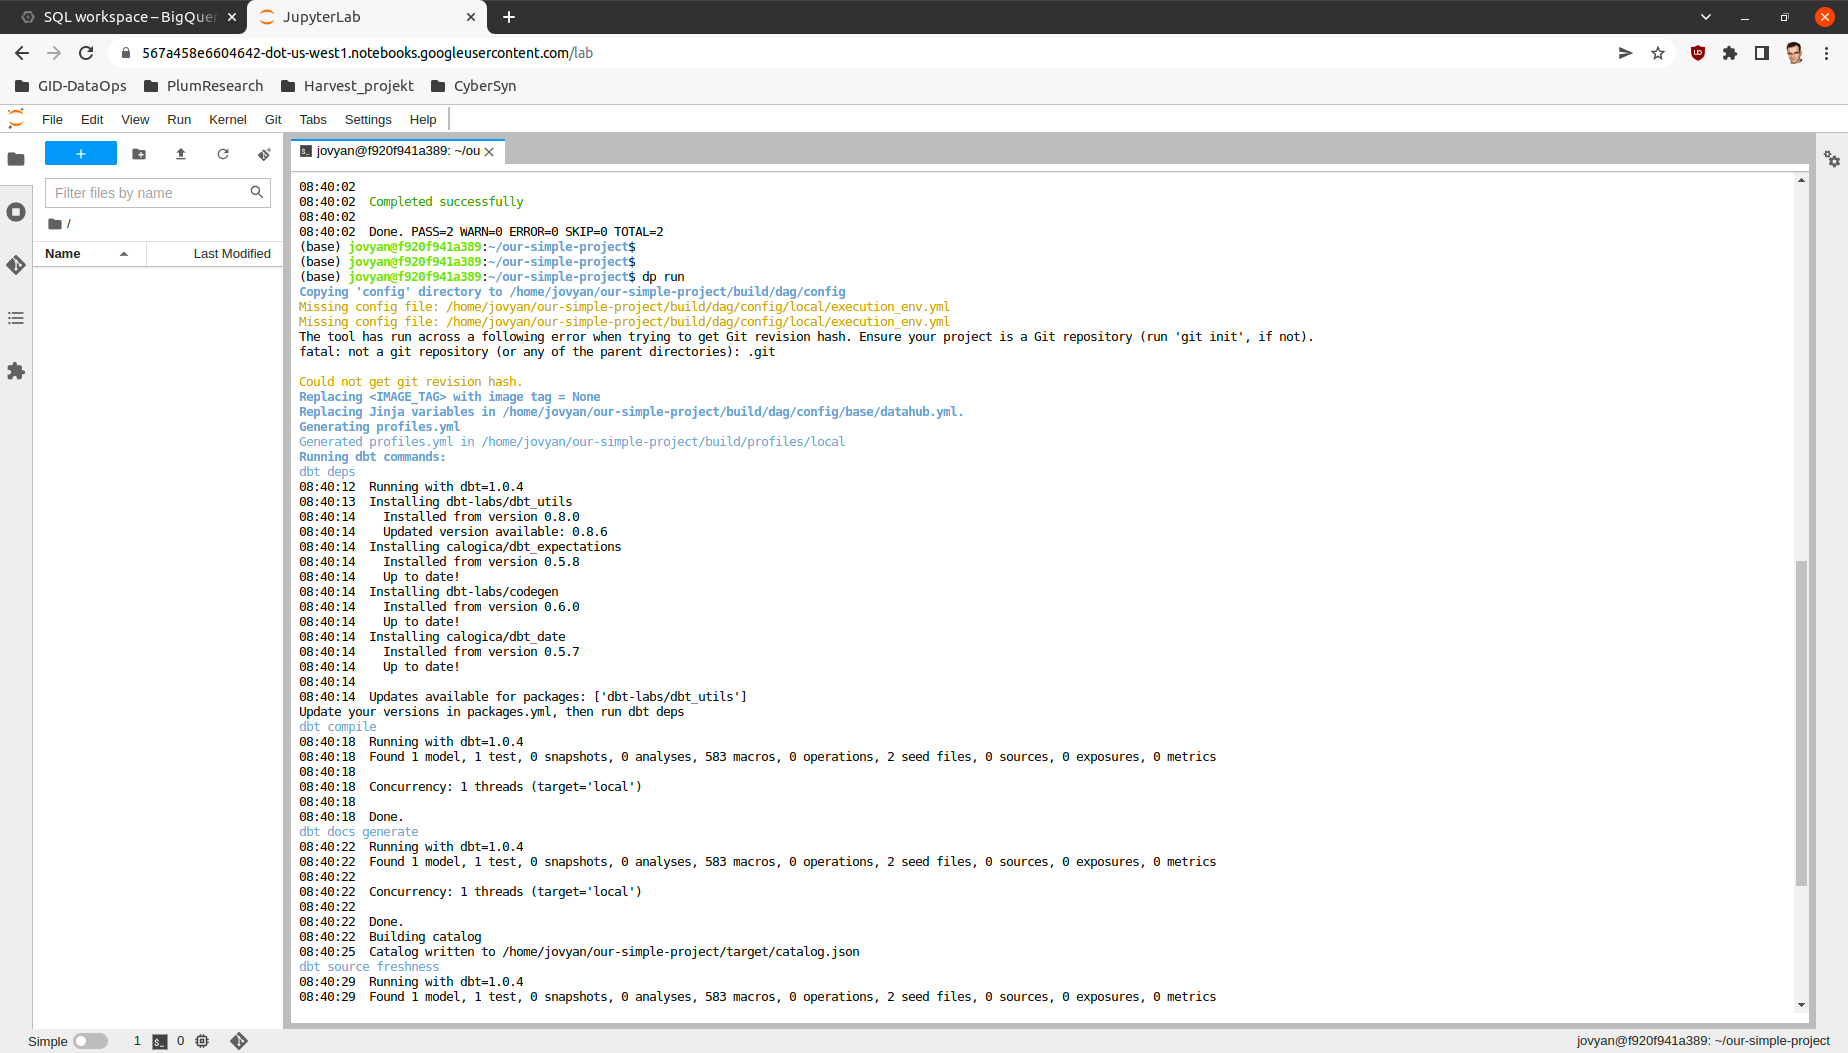
Now after all the tables and views are created we can also check, if the models work as intended by running the tests.
dp test
dbt sources and automatic models creation
With the help of dbt-codegen and
dbt-profiler, one can easily generate source.yml, source’s base
model SQLs, and model-related YAMLs. dp offers a convenient CLI wrapper around those functionalities.
First, add the dbt-codegen package to your packages.yml file:
packages:
  - package: dbt-codegen
    version: 0.5.0  # or newer
Then, run dp generate source-yaml YOUR_DATASET_NAME to generate source.yml file in models/source directory.
You can list more than one dataset, divided by space. After that, you are free to modify this file.
When you want to generate SQLs for your sources, run dp generate source-sql. It will save those SQLs in the directory
models/staging/YOUR_DATASET_NAME.
Finally, when you have all your models prepared (in the form of SQLs), run dp generate model-yaml MODELS_DIR to
generate YAML files describing them (once again, you are not only free to modify them but also encouraged to do so!).
E.g., given such a directory structure:
dp generate model-yaml models/ will create models/staging/my_source/my_source.yml,
models/staging/intermediate/intermediate.yml, and models/presentation/presentation.yml. Beware, however, this
command WILL NOT WORK if you do not have those models created in your data warehouse already. So remember to run
dp run (or a similar command) beforehand.
If you add the dbt-profiler package to your packages.yml file too, you can call
dp generate model-yaml --with-meta MODELS_DIR. dbt-profiler will add a lot of profiling metadata to
descriptions of your models.
Project deployment
dp deploy executes the deployment of a project. Depending on the configuration the command may execute different steps
described in this section. Please be aware that this command is meant for the CICD process and usually should be avoided as manual activity.
Blob storage synchronization
The main action of the dp deploy command is synchronization with your bucket provider. The provider will be chosen automatically based on the remote URL.
Usually, it is worth pointing dp deploy to a JSON or YAML file with provider-specific data like access tokens or project
names. The provider-specific data should be interpreted as the **kwargs (keyword arguments) expected by a specific
fsspec’s FileSystem implementation. One would most likely want to
look at the S3FileSystem or
GCSFileSystem documentation.
E.g., to connect with Google Cloud Storage, one should run:
echo '{"token": "<PATH_TO_YOUR_TOKEN>", "project_name": "<YOUR_PROJECT_NAME>"}' > gs_args.json
dp deploy --dags-path "gs://<YOUR_GS_PATH>" --blob-args gs_args.json
However, in some cases, you do not need to do so, e.g. when using gcloud with properly set local credentials. In such
a case, you can try to run just the dp deploy --dags-path "gs://<YOUR_GS_PATH>" command and let gcsfs search for
the credentials.
Please refer to the documentation of the specific fsspec’s implementation for more information about the required
keyword arguments.
You can also provide your path in the config/base/airflow.yml file, as a dags_path argument:
dags_path: gs://<YOUR_GS_PATH>
# ... rest of the 'airflow.yml' file
In such a case, you do not have to provide a --dags-path flag, and you can just call dp deploy instead.
Docker image
dp deploy command builds Docker image with dbt and project and sends it go Docker Registry. Docker registry may be
configured via Environment Variables (eg. DOCKER_AUTH_CONFIG) and the image repository can be configured in
execution_env.yml file. Use --docker-push flag to enable docker pushing during deployment.
DataHub synchronization
The deployment also sends metadata to DataHub based on receipt created in datahub.yml file. Use --datahub-ingest
flag to enable DataHub synchronization.
Packing and publishing
Sometimes there is a need to reuse data created in other projects and/or by a different team. The built project can be
converted to a dbt package by calling dp publish. dp publish parses manifest.json
and prepares a package from the presentation layer. It lists models created by transformations and they usually are a final product of a project. The models are prepared in form of dbt sources. Created metadata files are saved in the build/package directory and sent to a git repository
configured in publish.yml file.
Publication repo usually is private for a company and appropriate permissions are required. We recommend key-based
communication. You can use --key-path as a parameter to point to the key file with push permissions.
Using published sources
Published packages can be used as standard dbt packages by adding them in packages.yml in the following form:
packages:
 - git: "https://{{env_var('DBT_GIT_USER_NAME', '')}}:{{env_var('DBT_GIT_SECRET_TOKEN', '')}}@gitlab.com/<path to you repository>"
   subdirectory: "<upstream project name>"
Dependencies metadata
Created metadata files containing extra information about the project name (which can be also Airflow DAG name).
"source_meta": {
   "dag": "<project name>"
}
This way explicit dependencies can be created in the execution environment. For more information see the documentation of dbt-airflow-factory <https://dbt-airflow-factory.readthedocs.io/en/latest/features.html#source-dependencies>
Clean project
If needed call dp clean to remove compilation-related directories.
Load seed
One can use dp seed to load seeds from the project. Use --env to choose a different environment.
Serve documentation
dbt creates quite good documentation and sometimes it is useful to expose them to your coworkers on a custom port. To do that you can run
dbt docs --port <port> command.